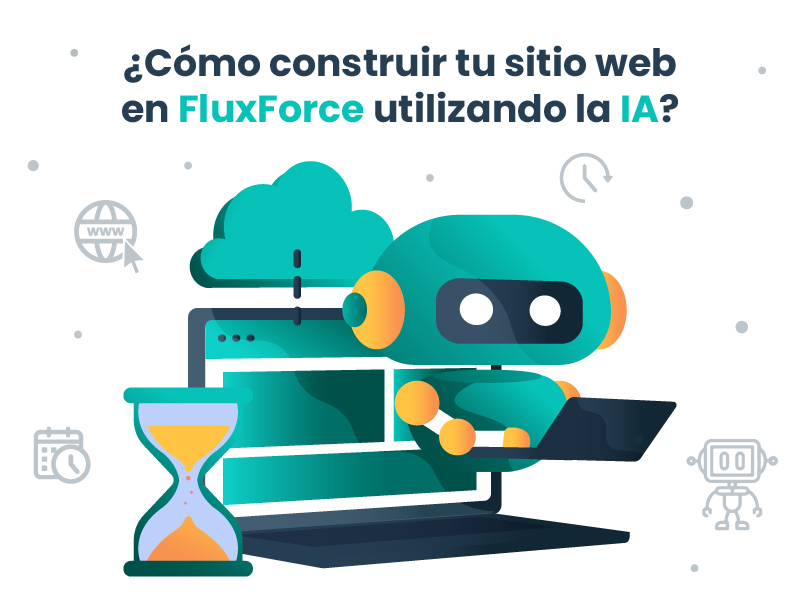
Creating a professional website tailored to your company’s needs can be a complex and costly task when you lack the necessary programming knowledge or simply don’t have enough time to develop it. In addition to this, there are costs associated with hosting, domain, server configuration, etc. One of the main objectives of our platform is to make clients’ lives easier, so taking advantage of the ability to create unlimited landing pages in all our plans, you can build your website on FluxForce using AI, totally free and in just minutes.
As an All-in-One Marketing Automation platform, FluxForce offers a wide variety of tools that are particularly useful for companies like yours. In this article, we will share with you a step-by-step tutorial explaining how to easily and completely free create your own website using FluxForce to its fullest potential.
Among the many advantages you can enjoy by building websites with FluxForce, we can highlight that you:
- won’t have to pay for servers.
- don’t need to know programming.
- will have a wide range of pre-designed templates.
- will use a drag & drop builder that utilizes AI.
- will design a responsive website without being a designer.
- will be able to track your website.
- will have access to millions of professional, totally free images.
- will be able to add FluxForce forms to capture new leads.
- will integrate your website with your social media accounts.
Start now and discover how FluxForce can help you build an impressive website for free!
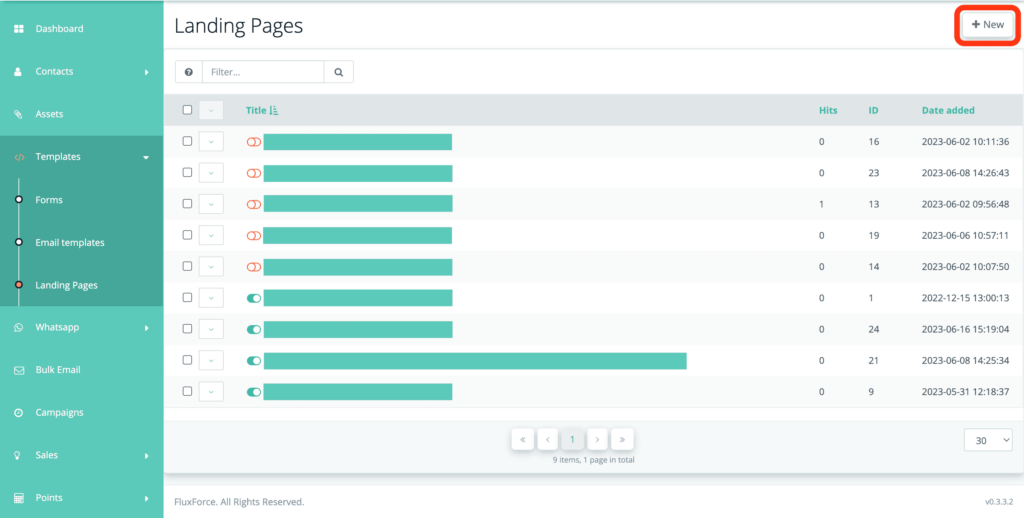
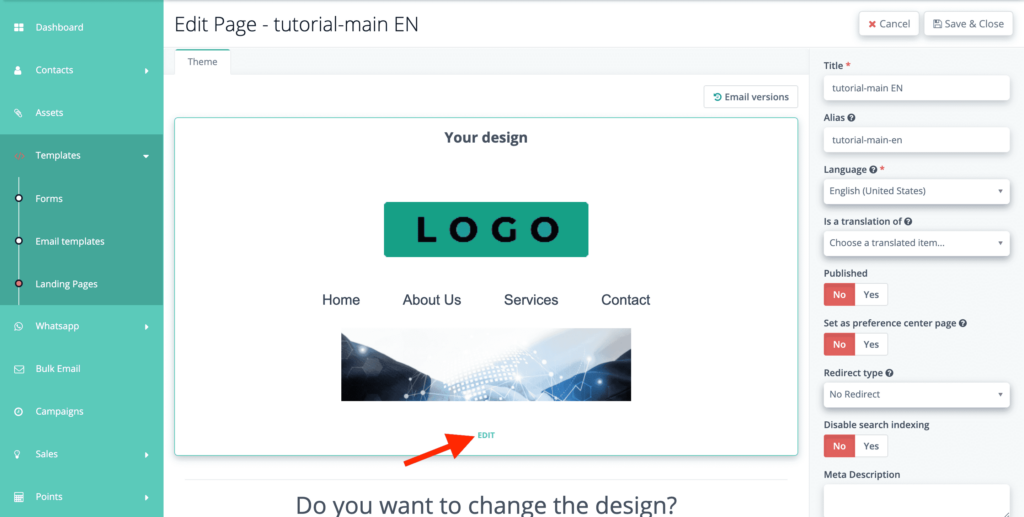
1- In your FluxForce account, go to “Templates” in the left menu and select “Landing Pages”.
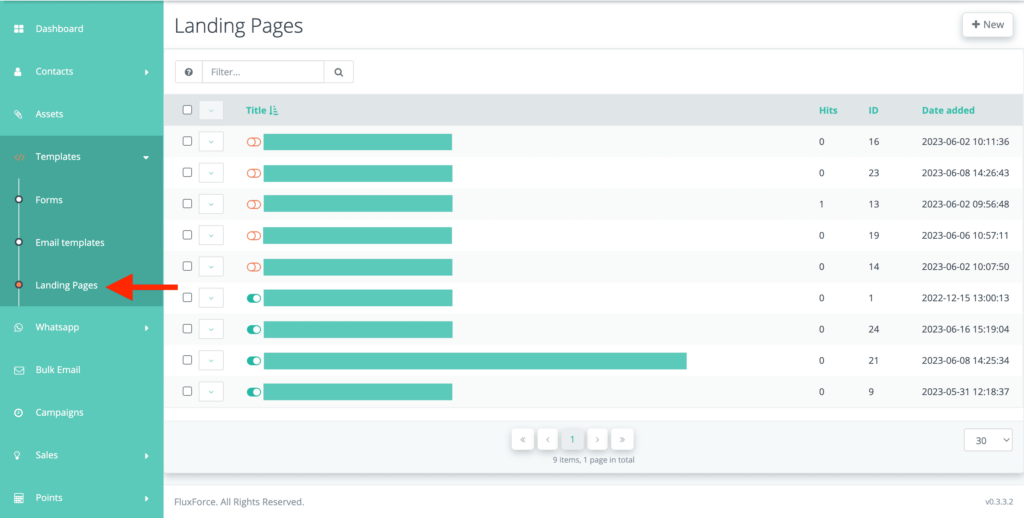
2- Click on the “New” button in the top right corner.
3- Enter the name of the template you want to create. This will be the internal name by which you can search for it within your FluxForce.
4- Choose one of the many pre-designed templates we offer, or if you want to start from scratch and create your own, select “Blank”.
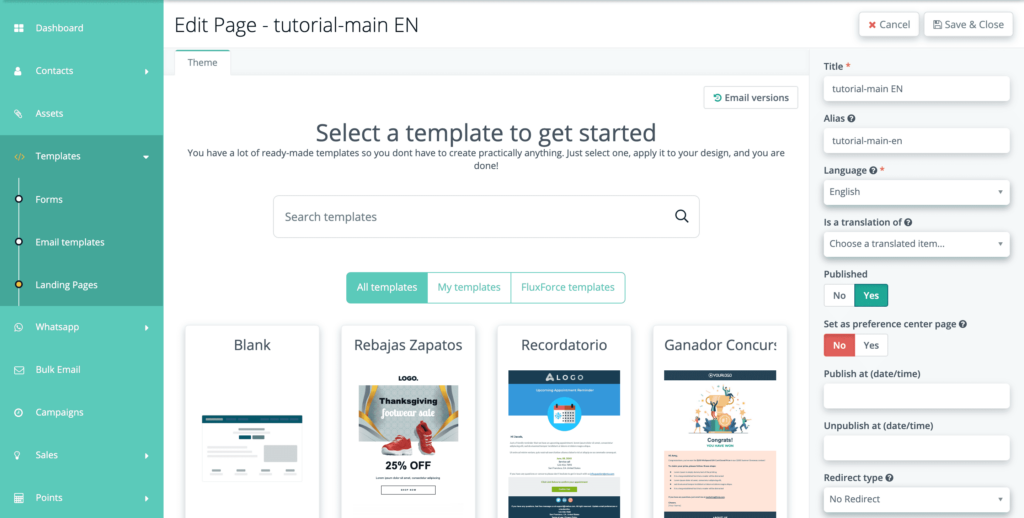
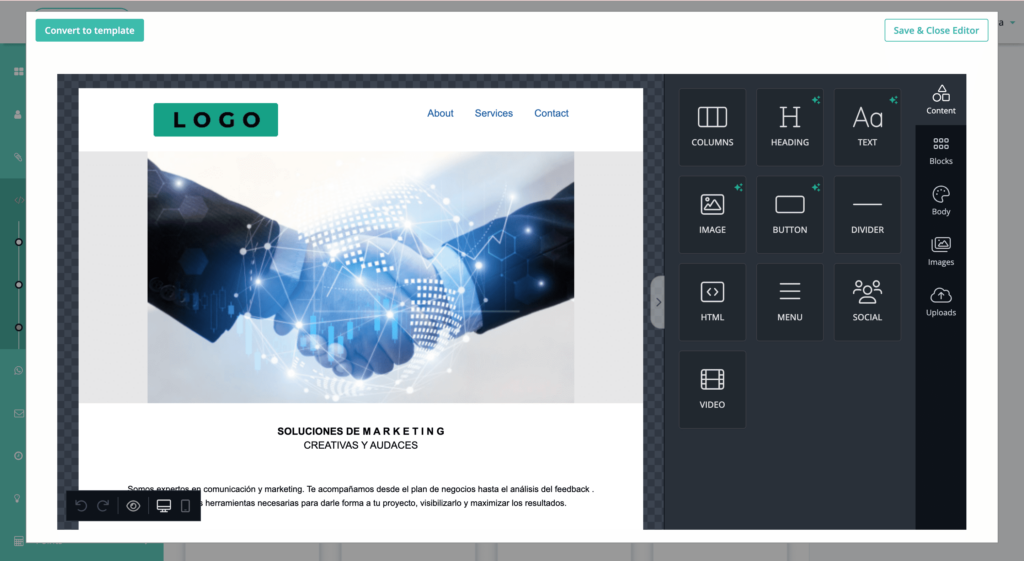
5- The template builder will open, allowing you to edit and customize your web page.
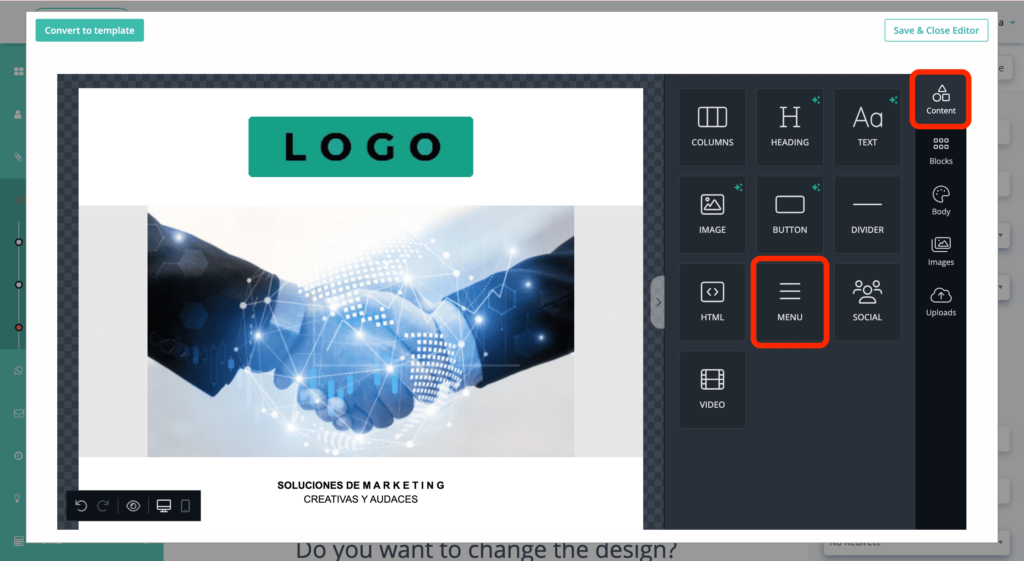
6- Since the goal is to create a functional website from multiple landing pages, it is essential to add links that allow us to navigate between them. There are two main ways to do this, which we will explain below.
Using a menu:
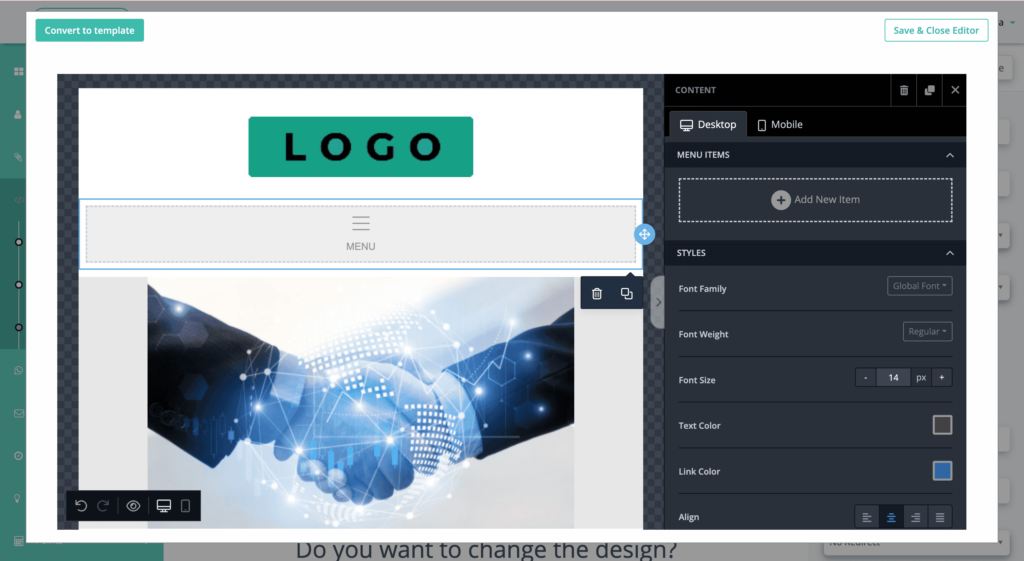
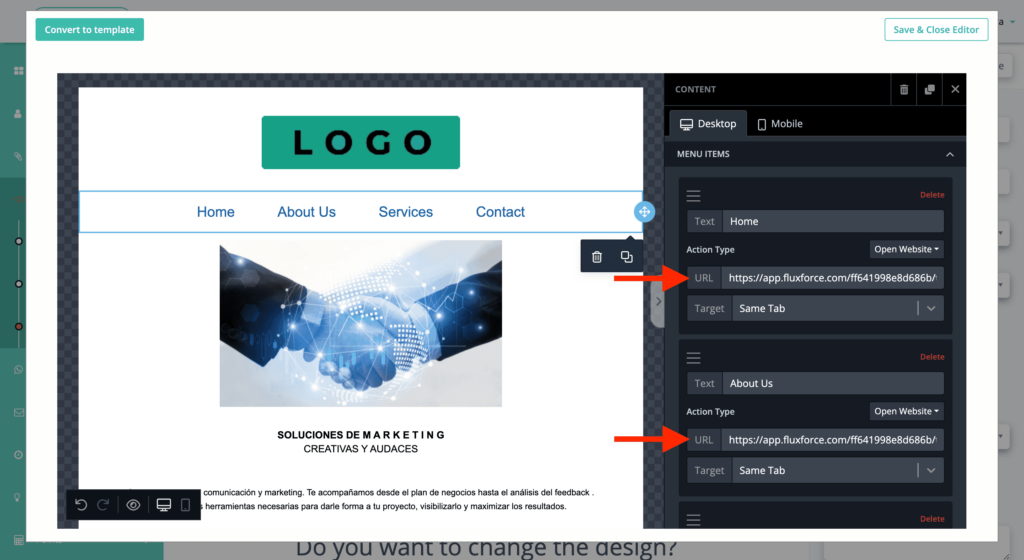
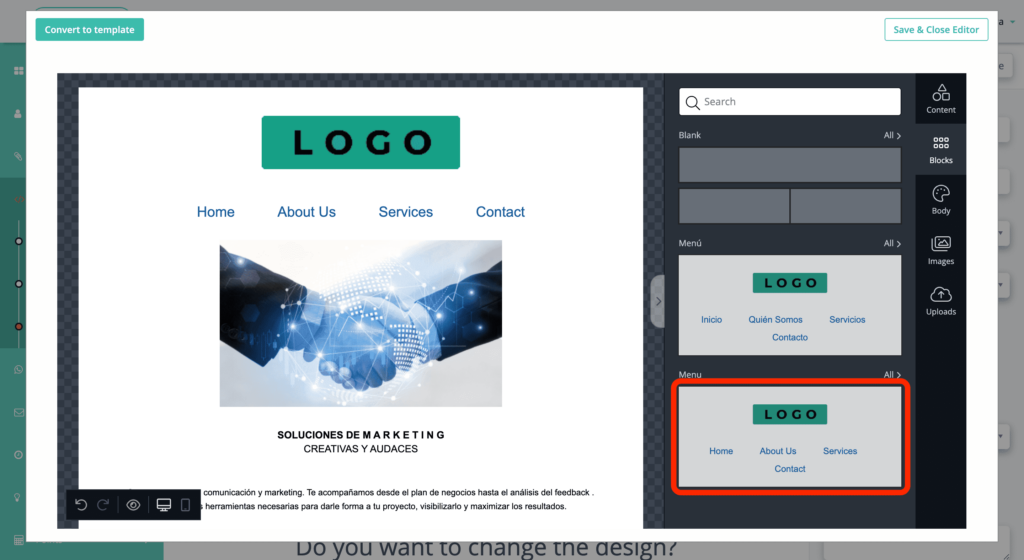
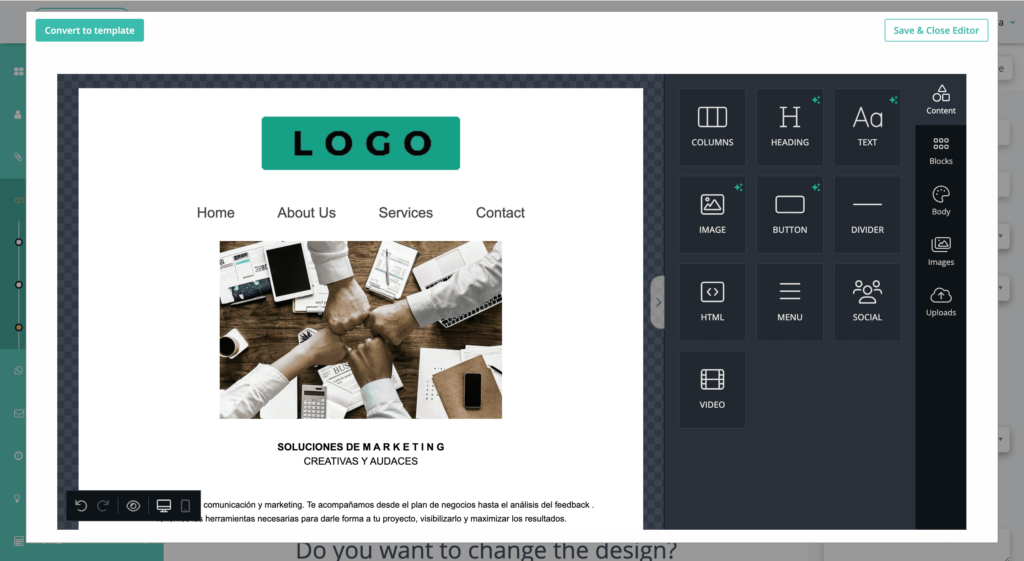
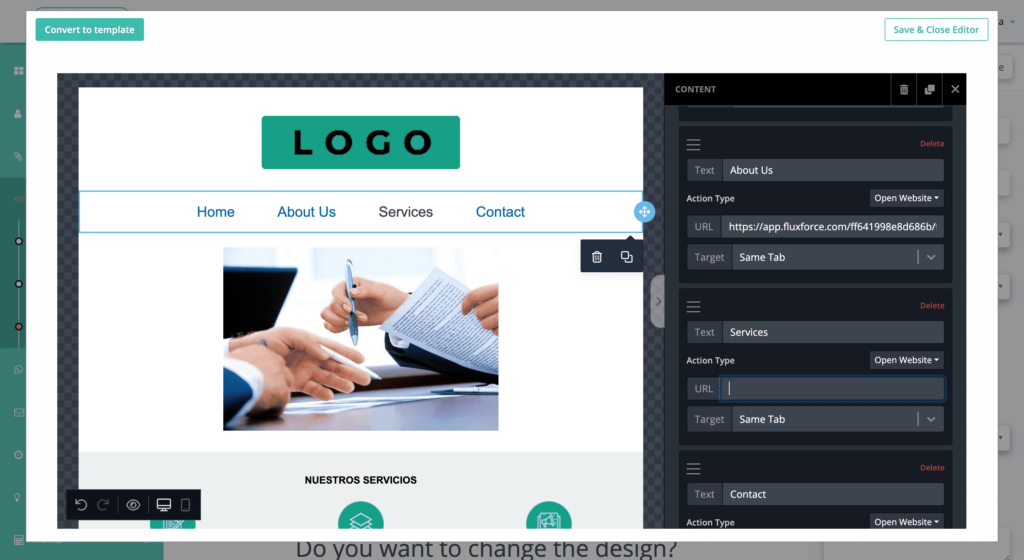
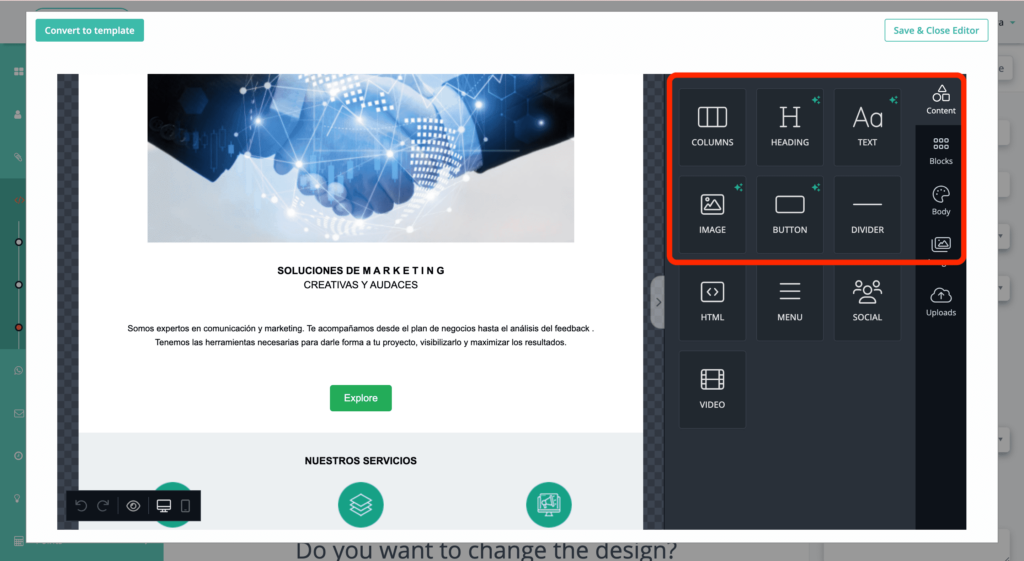
7- In the toolbar located on the right side of the builder, select “Content.” You will find the “Menu” element. Drag and drop it onto the page wherever you want it to appear. Choose a visible and easily accessible location, preferably in the header area.

8- The menu section will appear on the screen without any content. Click on this block to reveal all the customization options on the right side of the builder.
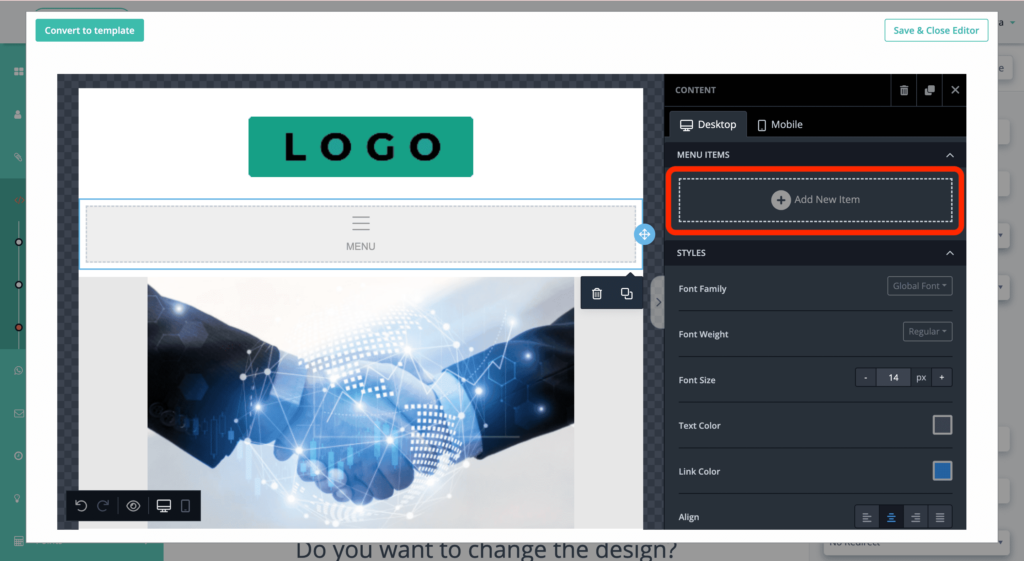
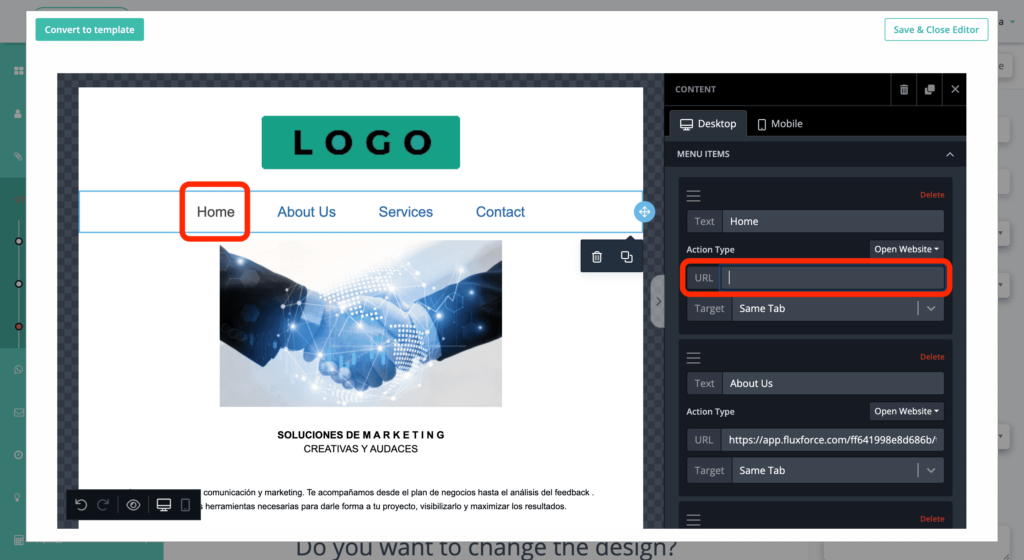
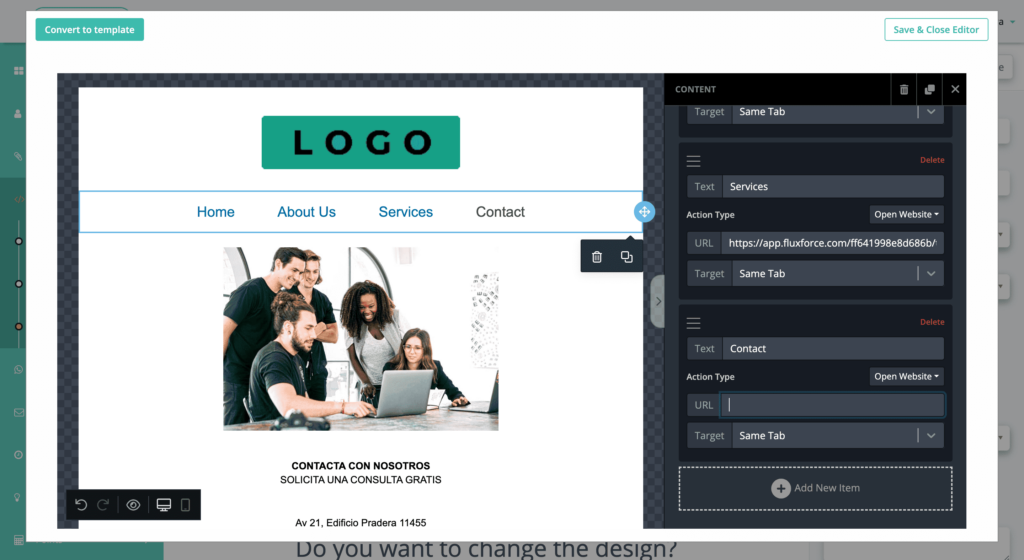
9- Let’s start with the “Menu Items” section. Click on “Add New Item.” As you can see, a link will appear on the screen. You can add as many items to the menu as needed, rearrange their order, and change the text according to how you want to use the links. Don’t worry about the “URL” box for now; we will come back to that later.

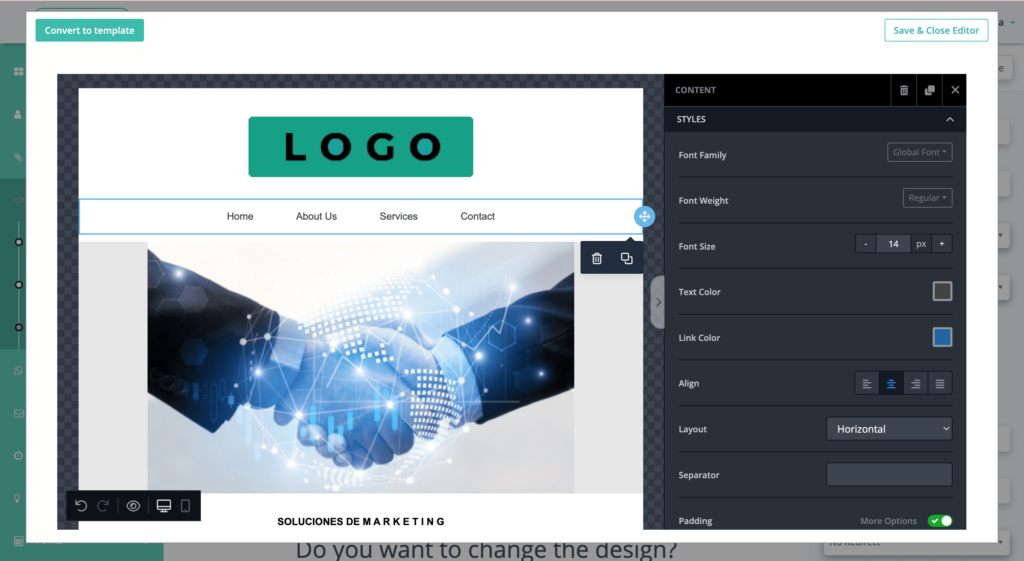
10- Further down, you will see all the ways you can customize your menu: font type and size, color, even the spacing within the page.
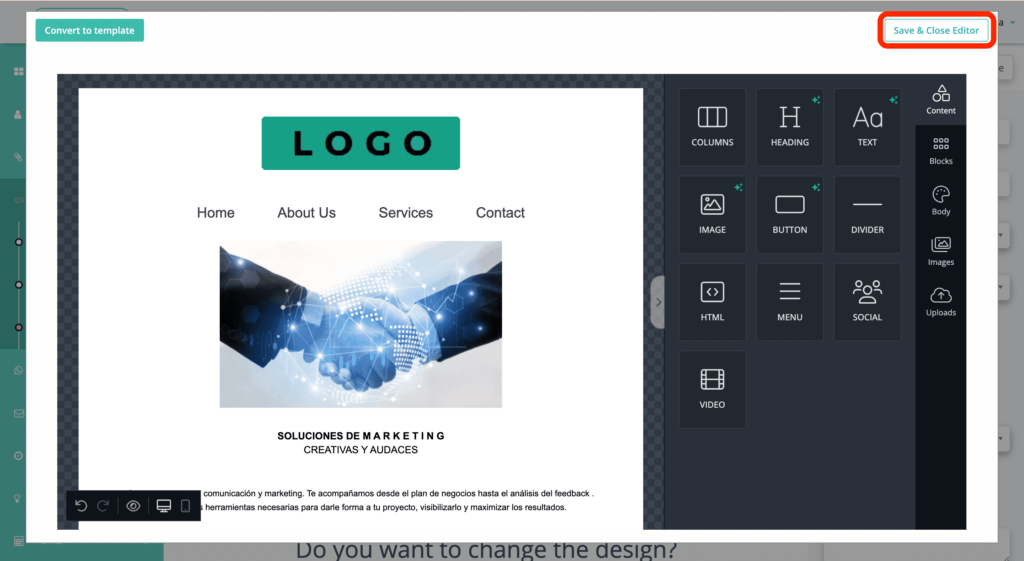
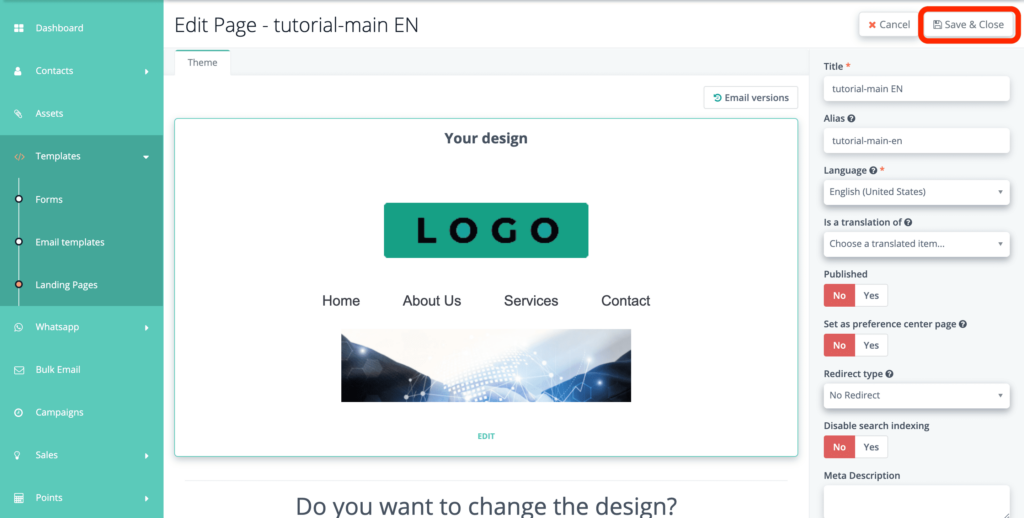
11- Once you are satisfied with the menu design and your entire page, it’s time to save your progress and exit the editing mode. To do this, click on the “Save and Close Editor” button, and then on “Save and Close” in the top right corner.
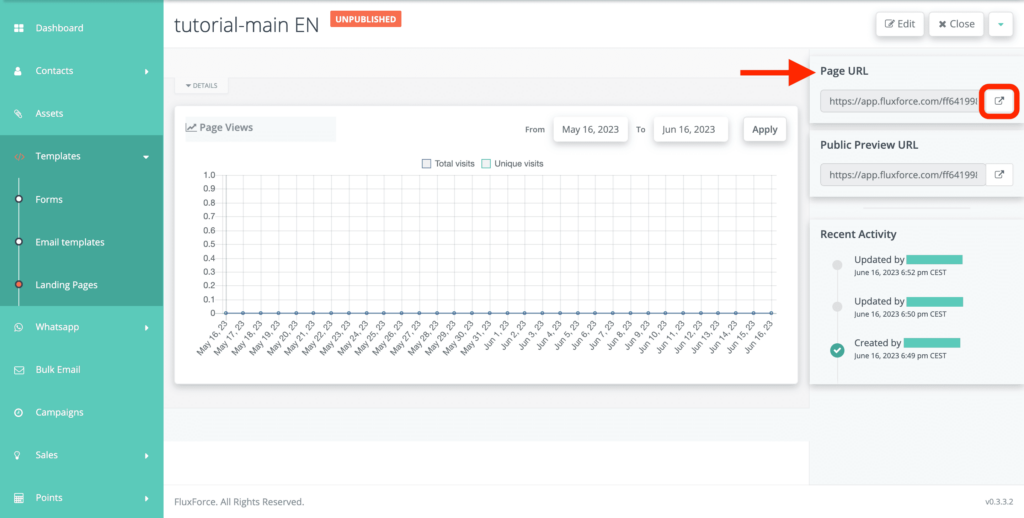
12- On the right side, you will see the URL of the page you just created. Copy and paste the URL into a text file. Alternatively, you can click on the arrow button to open the page in a new tab and monitor your progress as you make changes (refreshing the page after each modification).
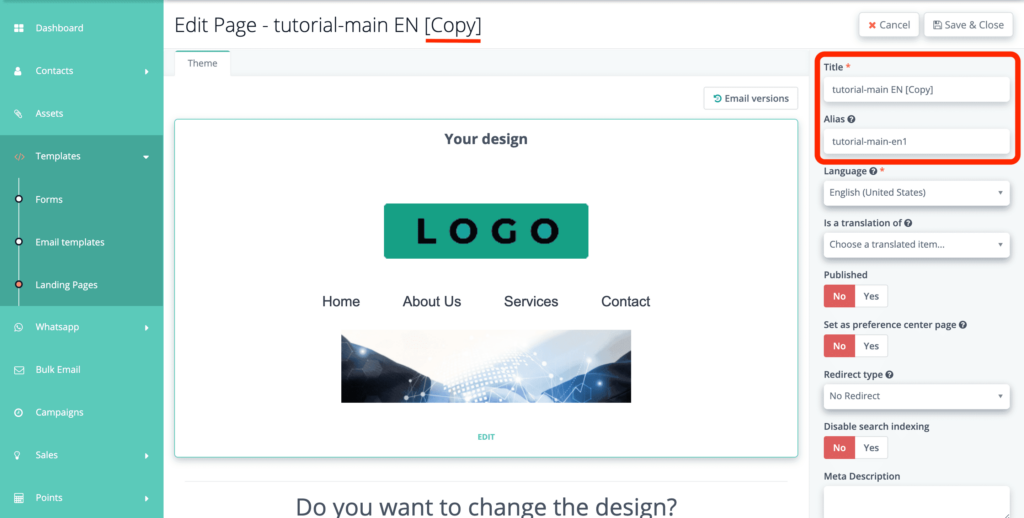
13- Now let’s create another page. Depending on the design, you can start from scratch or clone the page you just saved, as we have done, in order to maintain common elements within the website (header, footer, etc.). Keep in mind that when cloning, you should change the title and alias (the text that appears in the URL).
14- Once you have made all the necessary changes and are satisfied with the design of your new page, save your progress and copy the URL (steps 11 and 12).

15- Repeat this process to create as many pages as you need, always making sure to save the URL of each one in a way that clearly distinguishes them.

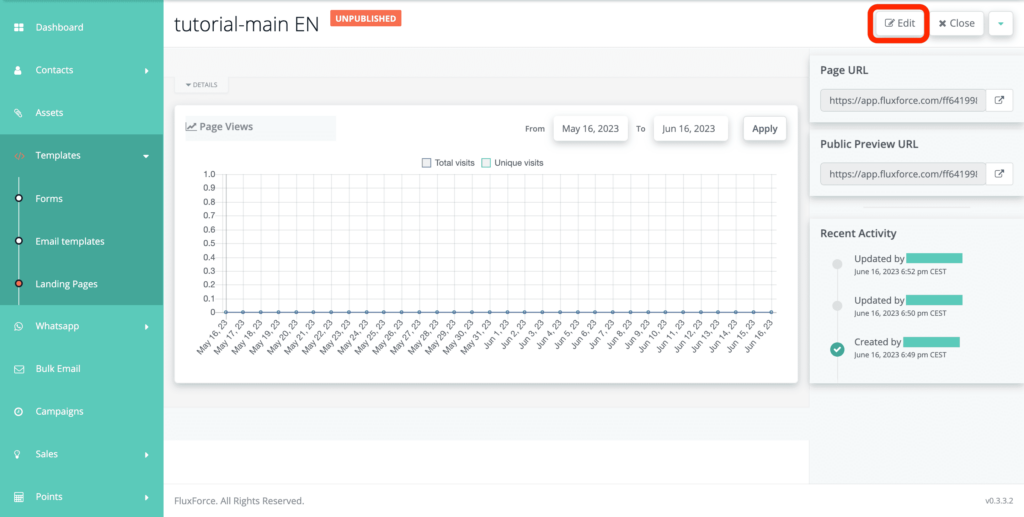
16- When you have finished creating all the pages you need, go back to the first one we called “Home.” In the same way, you can always go back and edit the other pages if you need to make any changes.
17- Remember the URLs you have been saving? Click on the menu and paste each one under the corresponding menu item. Now you have a complete index that allows you to navigate this network of interconnected pages.
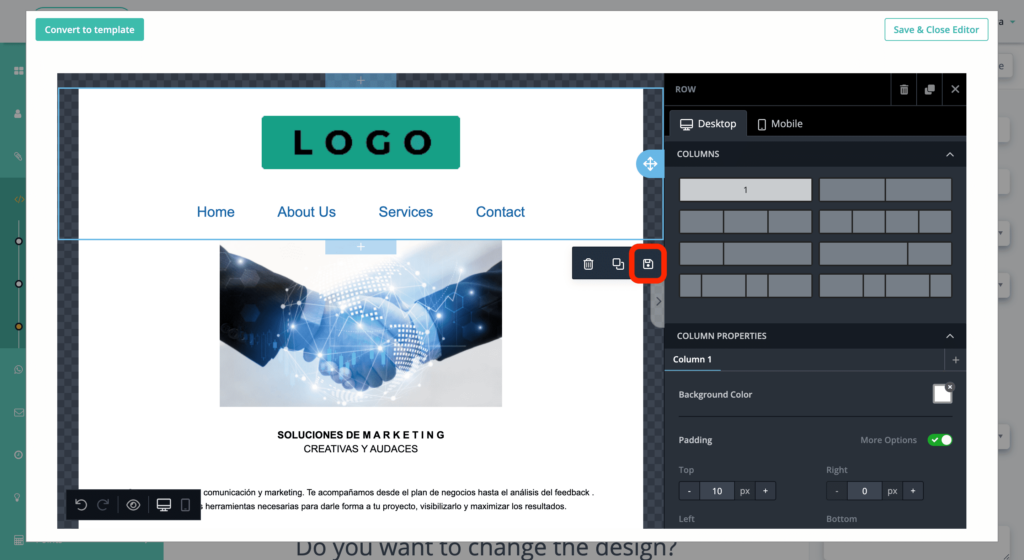
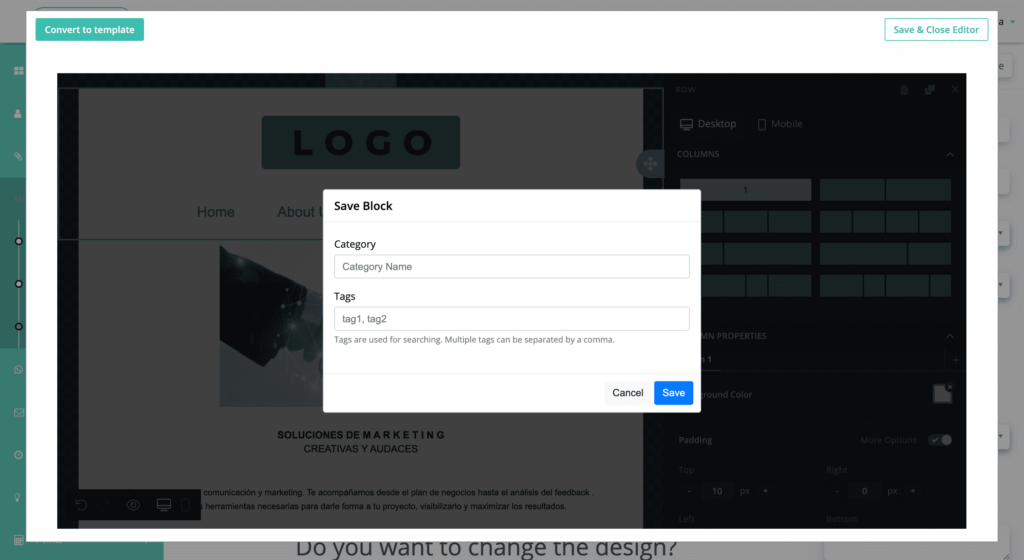
18- Select the row where the menu is located and click on “Save.” Then give a name to your block. It will be saved with all its content in the “Blocks” section so that you can reuse it in other templates.
19- To indicate which page the users are on, we recommend leaving the URL box blank in the corresponding menu item. This way, if a user is on the Home page, the link to it will appear in a different color as it will be disabled.
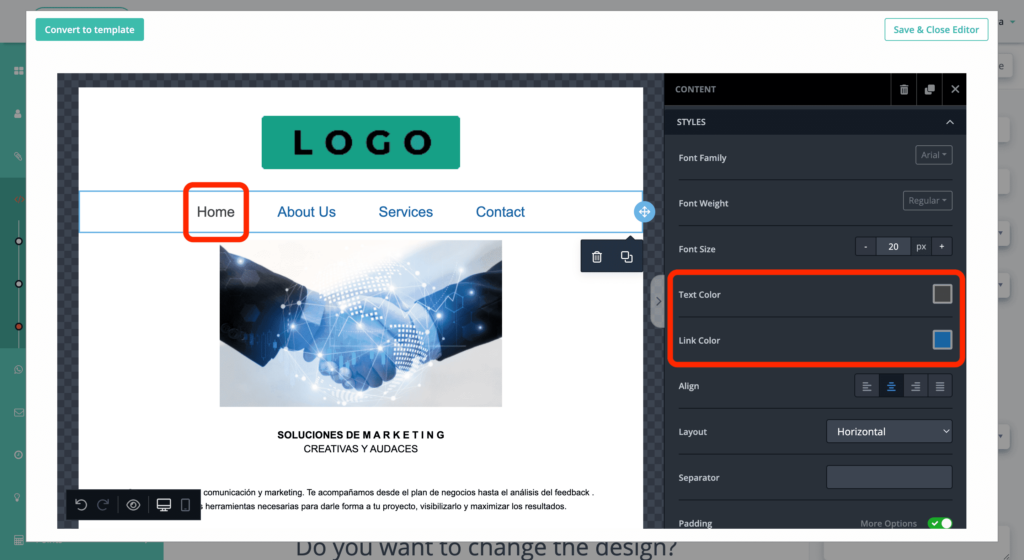
20- As you can see, when you add or remove a link, the text changes color. You can edit both the text color and link color in the “Styles” section under the menu’s customization options.
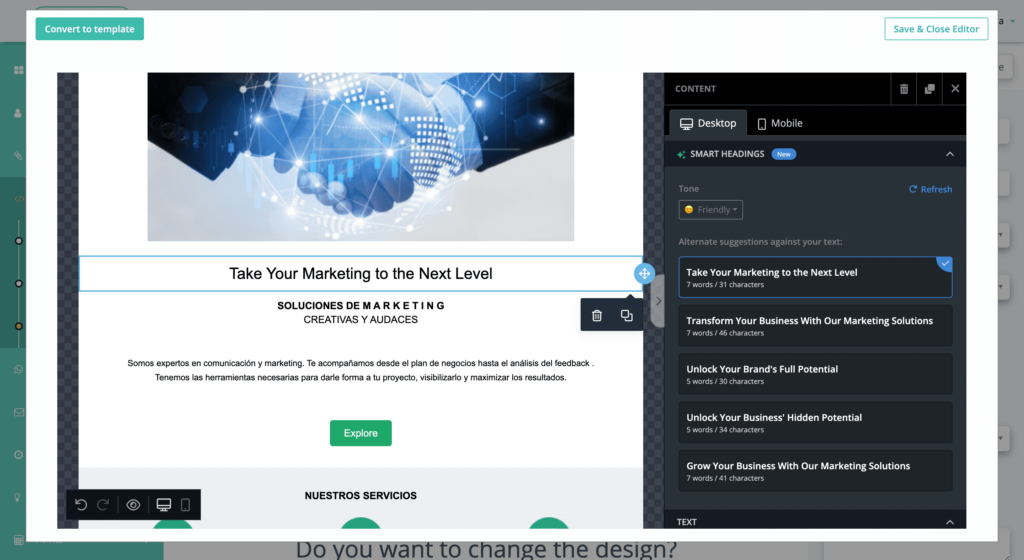
21- Once you’re done, save the changes and open another one of the pages you created earlier to edit it.
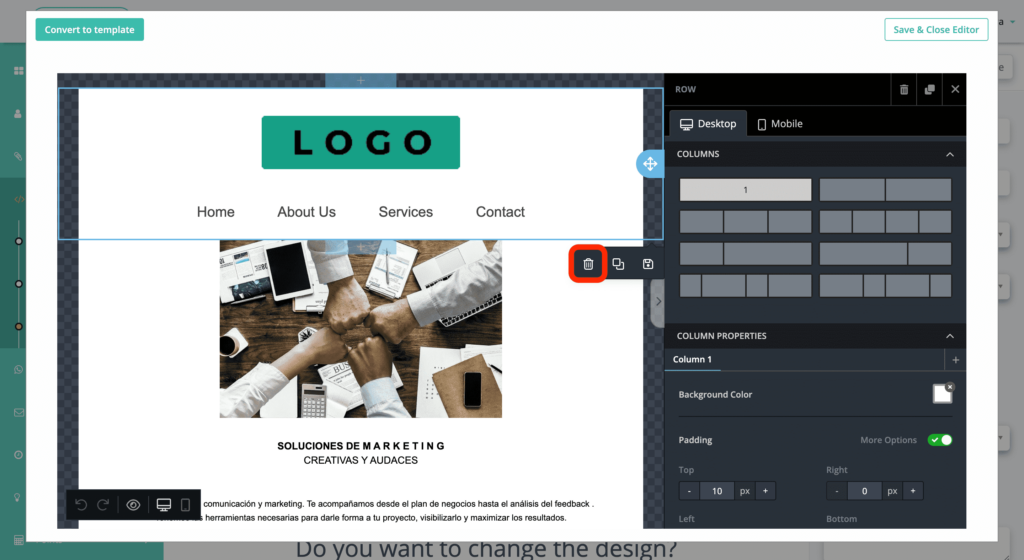
22- Select the first row (which contains the logo and menu) and delete it. We will replace it with the block we saved in step 18 so that the menu on all pages has the same links without the need to copy and paste them one by one.
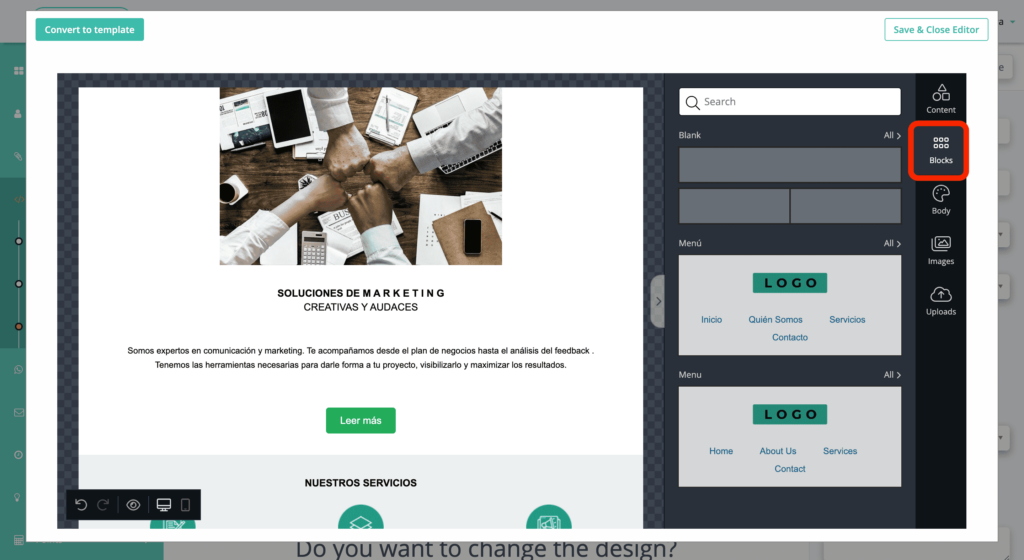
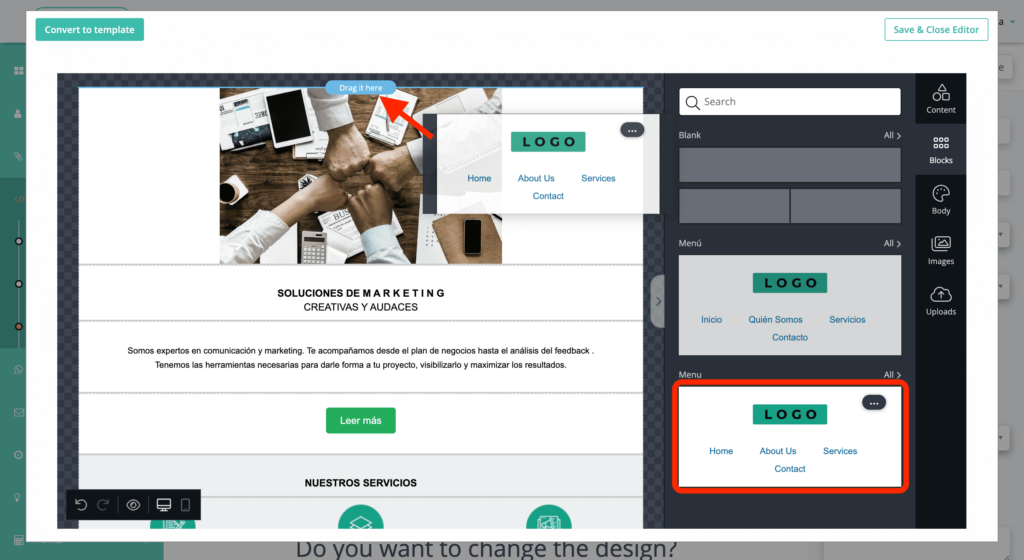
23- Go to the “Blocks” section and drag the block to the appropriate location within your page.
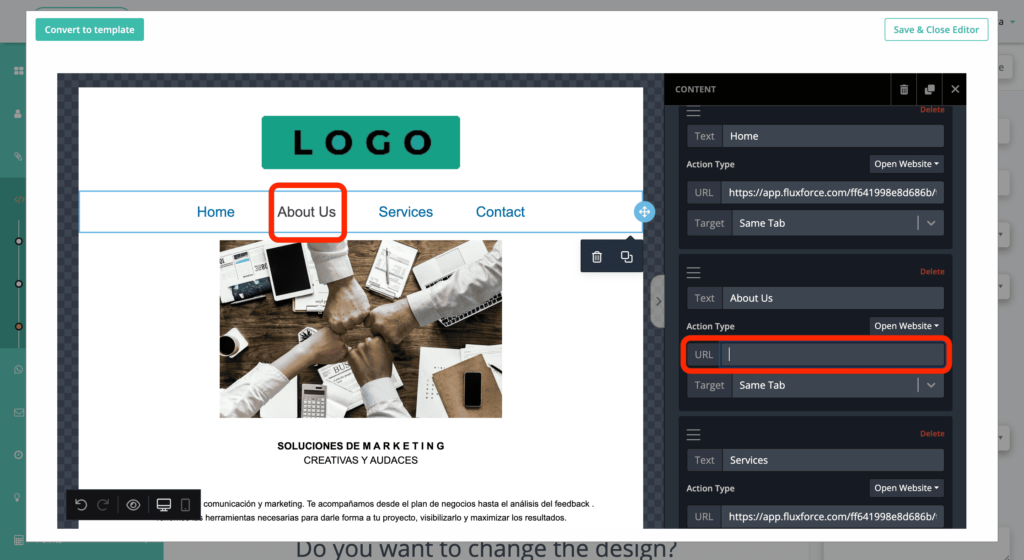
24- Remove the URL of the current page to disable the link and modify the color, just like in step 19.
25- Repeat steps 21-24 with each of the pages. You will gradually build a network of interconnected pages through the links in each menu.
Using buttons:
26- In addition to the menu, you can also use buttons to direct users to other pages.
27- To do this, click on “Content” on the right side of the editor and drag a button to where you want to insert it.
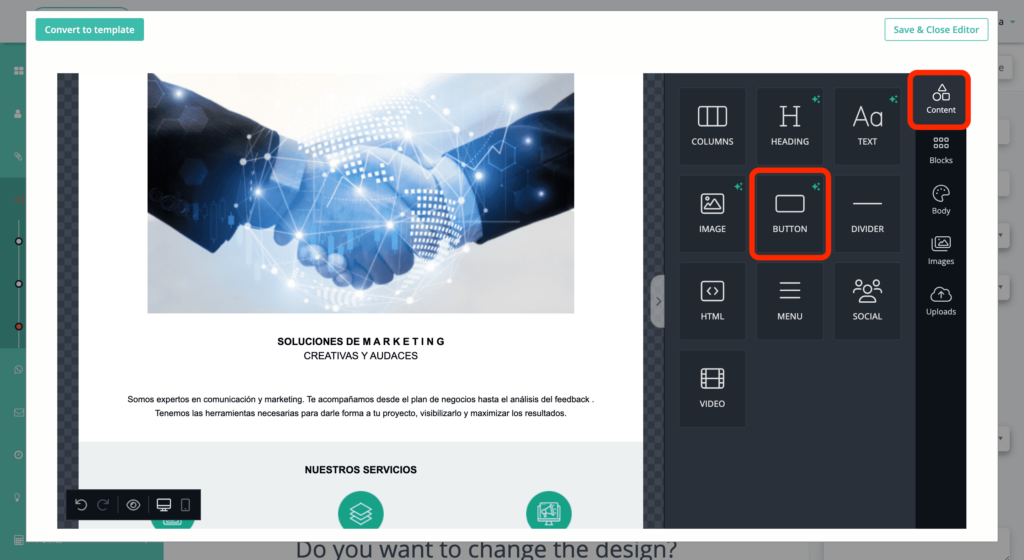
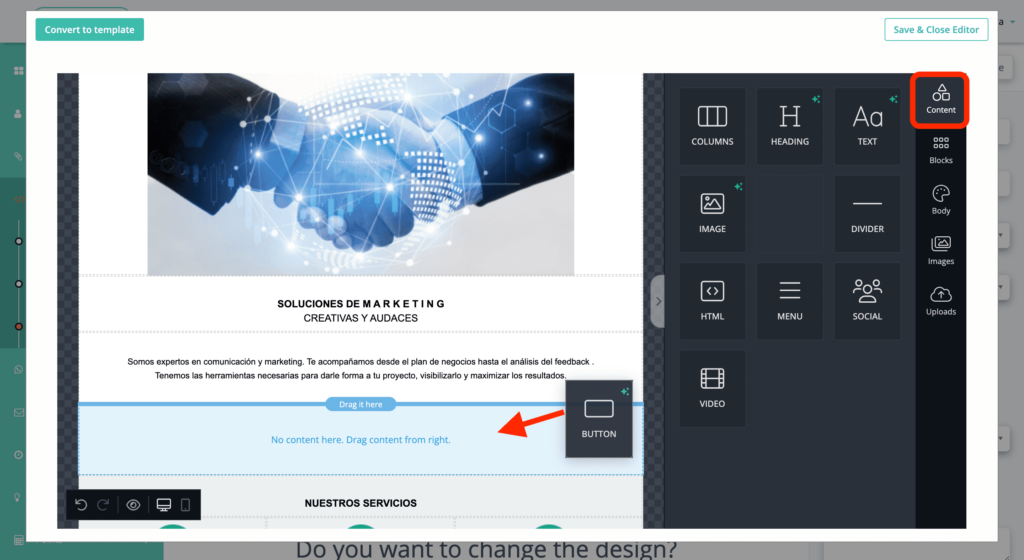
28- Just like the menu, you can customize the buttons to your liking. The most important setting is the section called “Action.” Here, you should paste the URL of the page to which you want this button to direct users. This way, you can create a network of interconnected landing pages, similar to what we did with the menu.
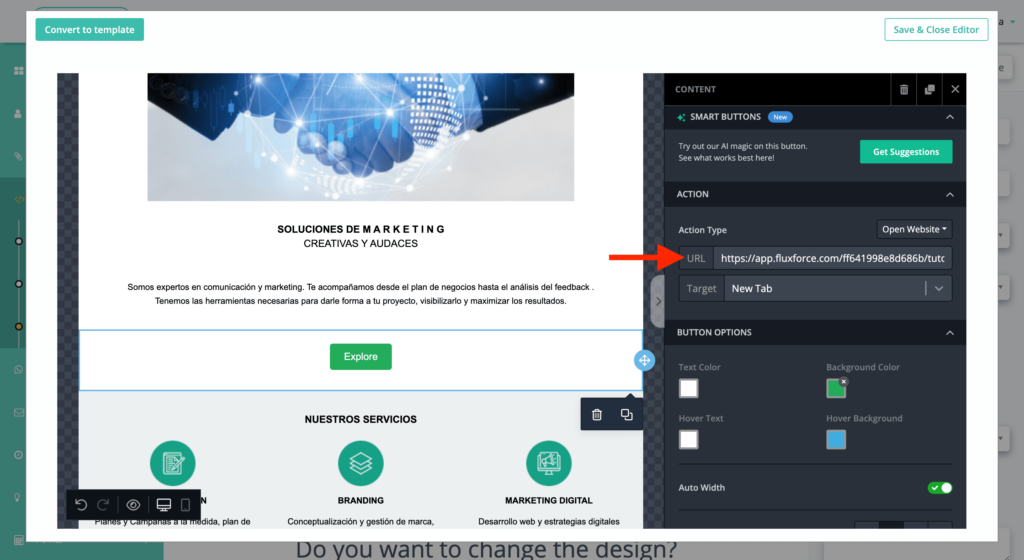
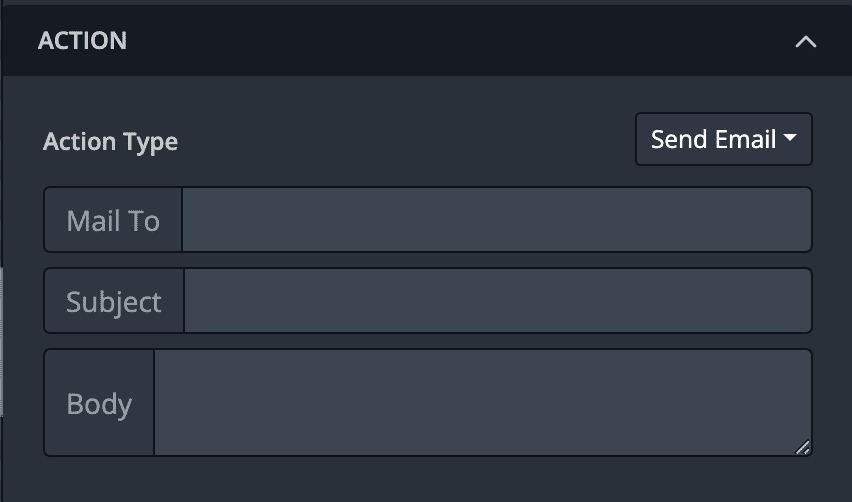
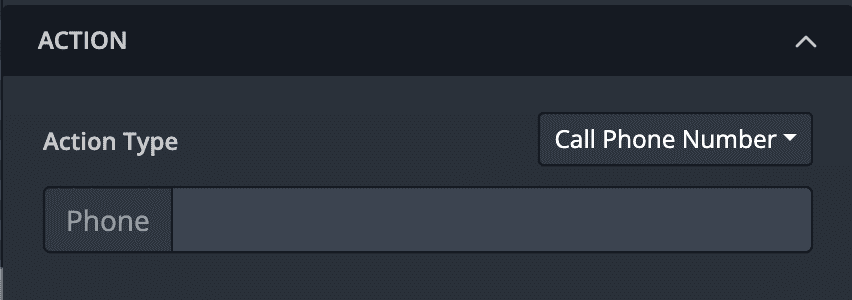
29- But wait, there’s more to buttons! Instead of “Open web page,” you can select other types of actions such as “Send email” or “Call phone number.”

Take advantage of the benefits of FluxForce’s Artificial Intelligence:
30- Once we have set the action that will be triggered by the button and inserted the URL or other necessary data for it, let’s take a look at the design options. Here, you can change everything from the text and spacing to the color and shape of the button. Have you noticed the section called “Smart Buttons”?
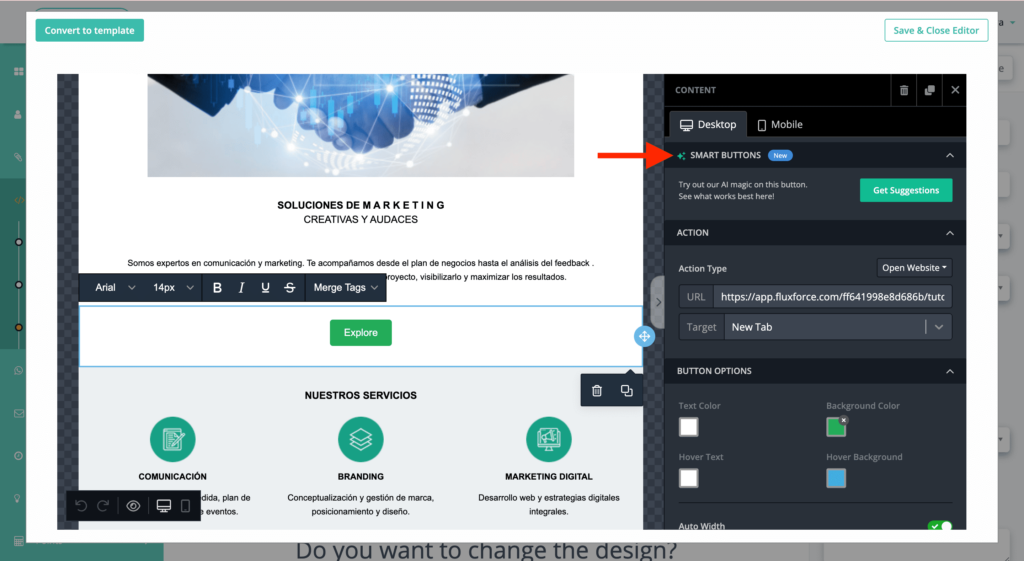
31- This innovative feature allows you to use Artificial Intelligence to encourage users to click on the button. Click on “Get suggestions” and enter some words that the AI can use as references.
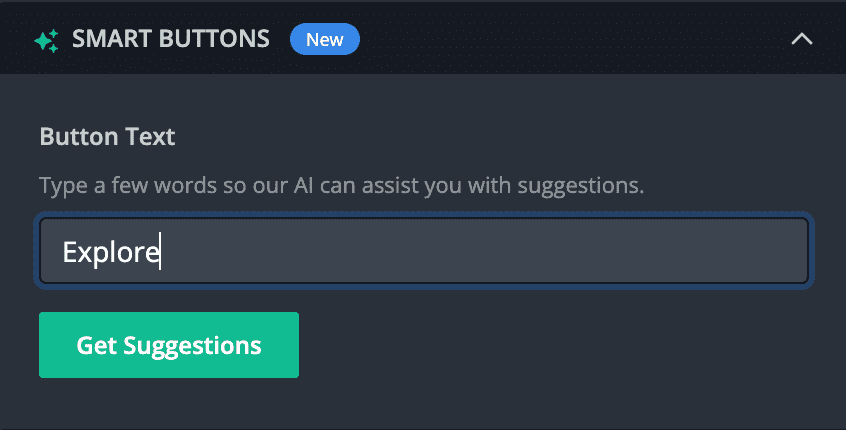
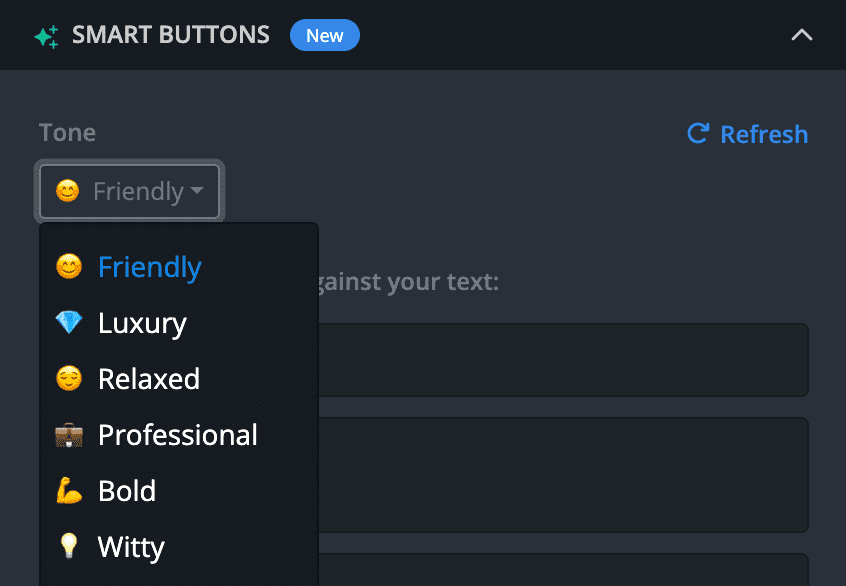
32- In a few seconds, you will get several suggestions for the button text. If you don’t like any of them, you can refresh to generate more. Additionally, you can choose the tone you want to convey in the text to reflect the personality of your company, whether it’s friendly, professional, and more.
33- But wait, there’s more! The Artificial Intelligence feature is not only available for buttons. Look for the icon of the little green sparkles to discover in what other ways you can use it.
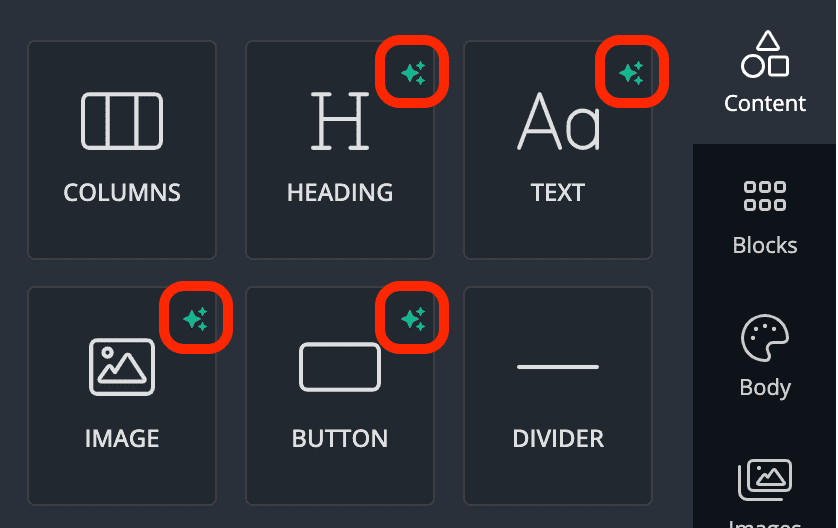
34- For example, just like with buttons, you can generate headlines using Artificial Intelligence. To do this, follow the same process of entering some keywords and select the tone you want for the headline. Artificial Intelligence will do the rest!
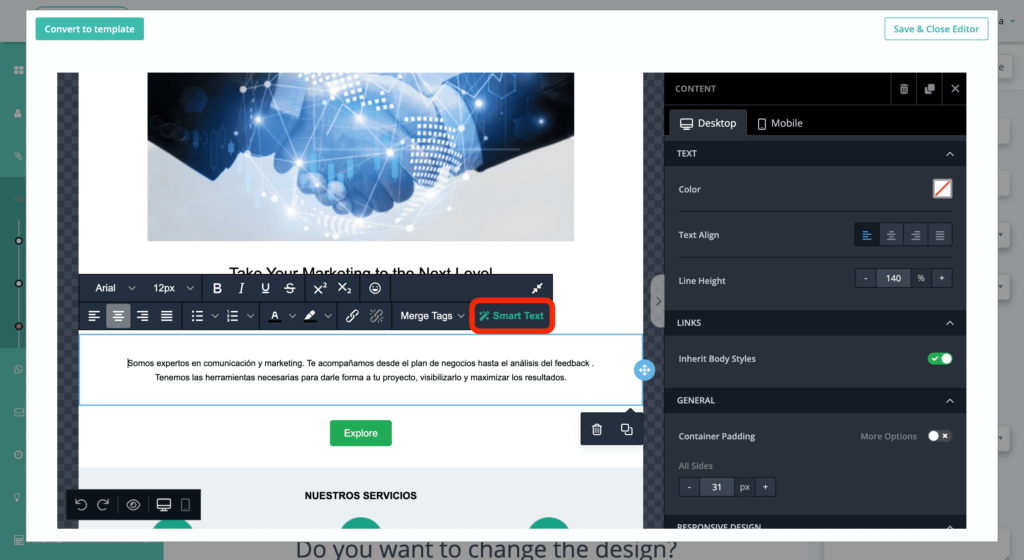
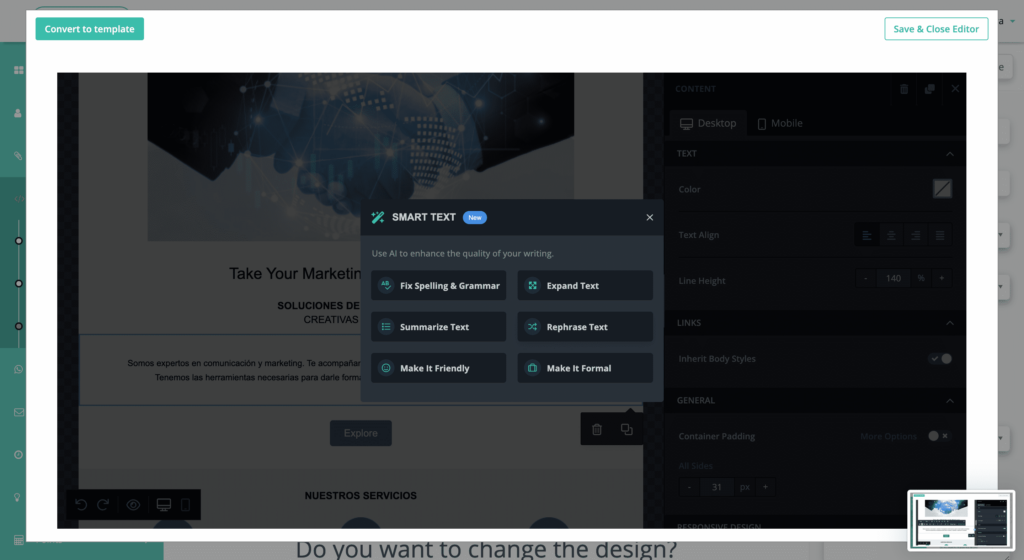
35- Smart text works slightly differently. To use this feature, select a text block and click on “Smart Text.” You will see all the different ways in which AI can help you improve the text.
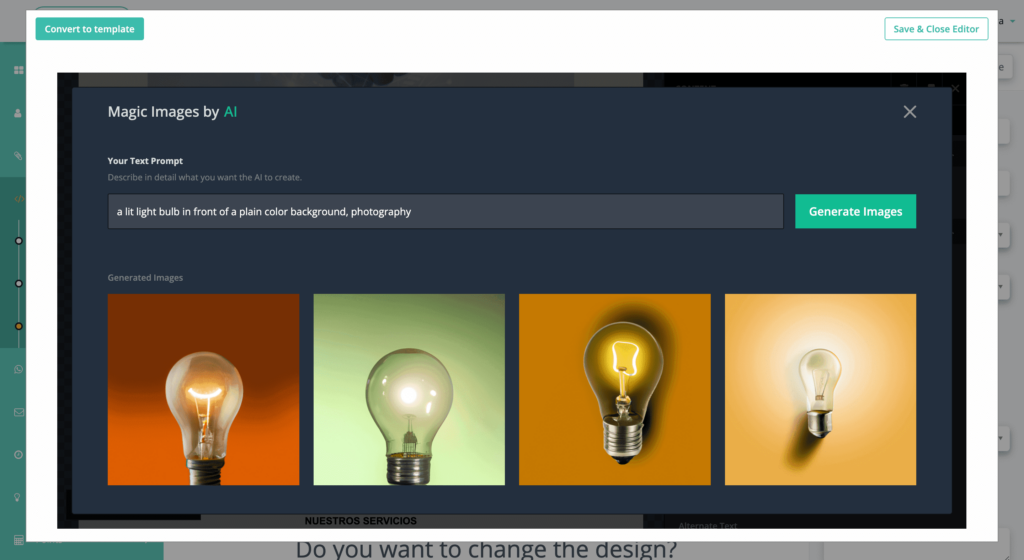
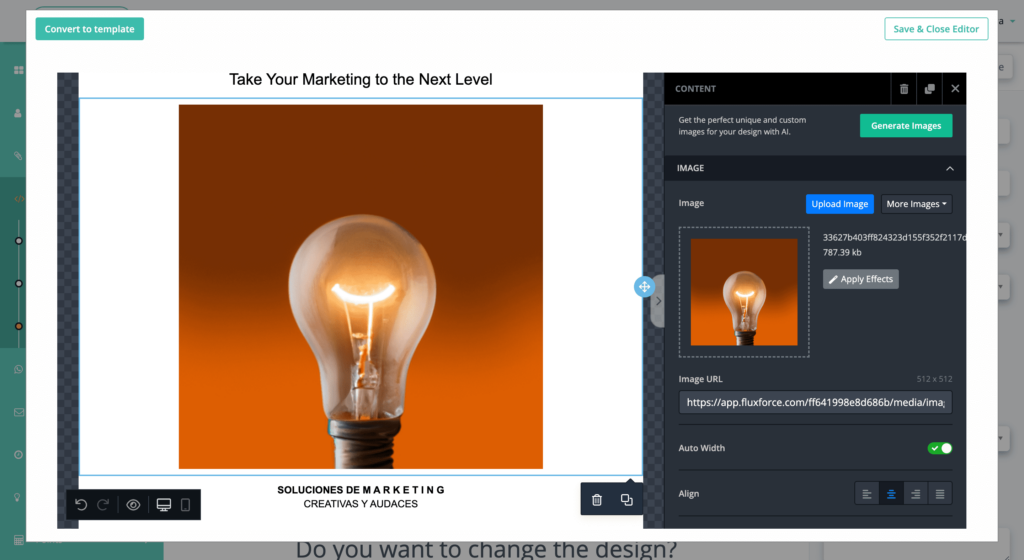
36- Finally, you can generate your own images using Artificial Intelligence. Click on the “Generate Images” button within the section called “Magic Image.” Instead of keywords, you need to describe in detail the image you would like to create. Avoid abstract concepts and focus solely on the visual aspect, and try to use language as specific as possible. The AI will generate several image proposals, and you can always refresh to get new ones. Select the one you like the most, and voila! You will have a completely unique and customized image to use on your page.

As you can see, designing your own website is very easy thanks to the wide range of customization options and the benefits of Artificial Intelligence. And the best part: it’s completely free!
In FluxForce, you set the limits!
To enjoy all the benefits of FluxForce, register here.