Integrating your WooCommerce online sales with FluxForce will ensure the transformation you’re seeking to optimize marketing efforts and increase your online sales. WooCommerce, the e-commerce platform for WordPress, enables businesses to efficiently sell products on their websites, while FluxForce, with its powerful marketing automation capabilities, facilitates the creation, configuration, and execution of multichannel digital marketing campaigns. By combining these two platforms, businesses can benefit from centralized management of their marketing and sales activities, improving the segmentation and personalization of their campaigns through automated workflows and integrated customer data. This integration not only simplifies campaign management but also allows businesses to offer more relevant and engaging experiences that will boost their sales and optimize their resources.
If you already have an online store and a FluxForce account, the next step is to download our plugin FluxForce Integration for WooCommerce and install it on your website.
Download our plugin to integrate your online store with FluxForce in just 5 minutes:
Install our plugin FluxForce Integration for WooCommerce on your website and then follow these simple steps:
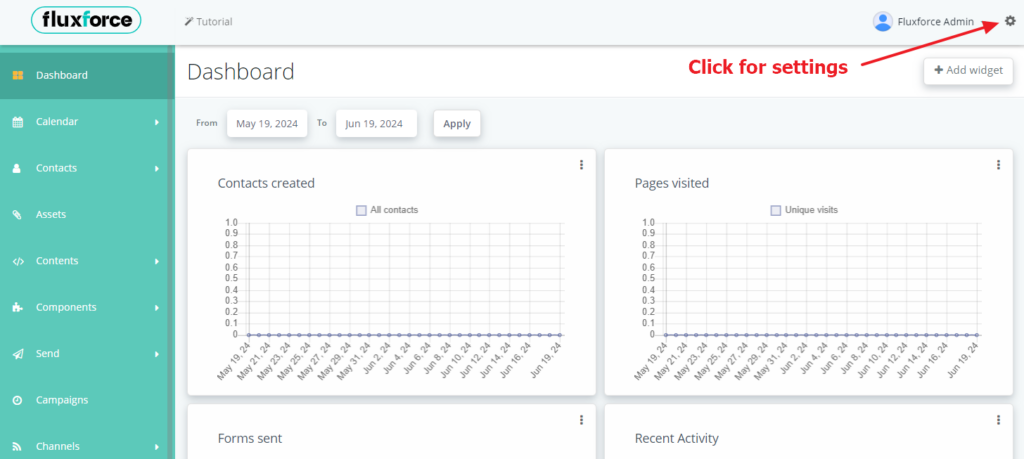
1. You need to set up a new APP in your FluxForce account for connection with the plugin. Navigate to FluxForce settings.
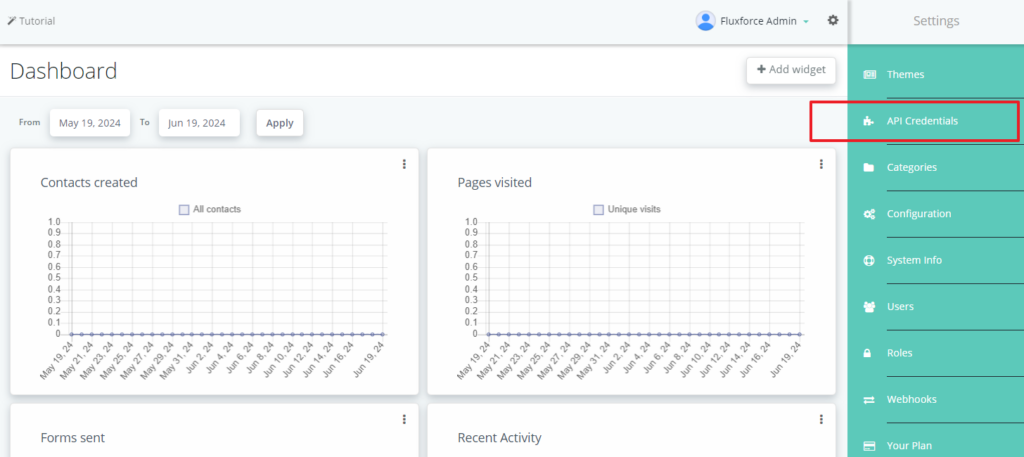
2. Go to the API credentials section to start with the new APP.
3. Click on New to create a fresh APP in FluxForce.
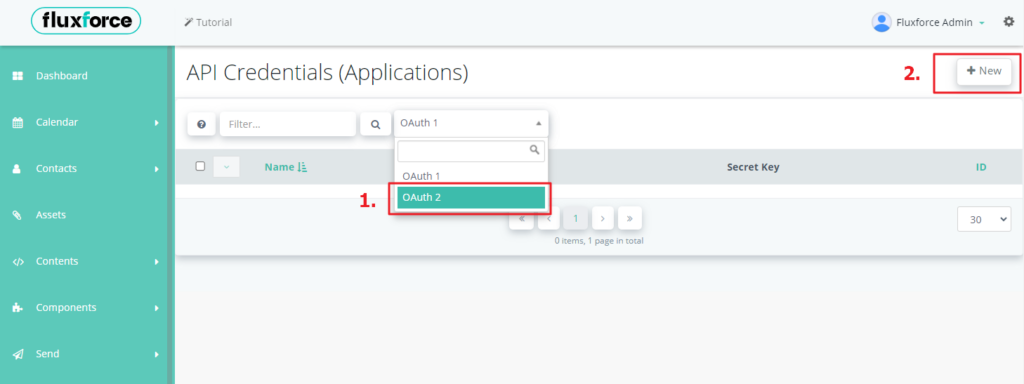
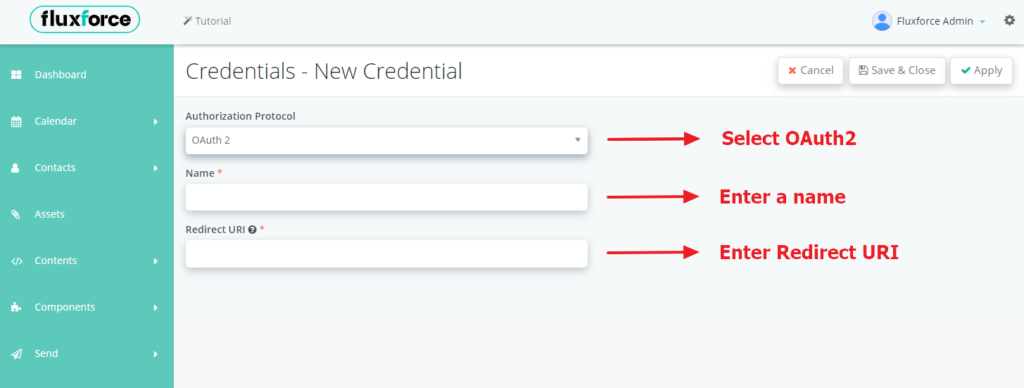
4. Start creating a new APP by filling valid credentials. Select OAuth2 for authorization protocol, give a new name to APP and then use your Redirect URI for the APP: https://yourdomain.com/wp-admin/admin.php
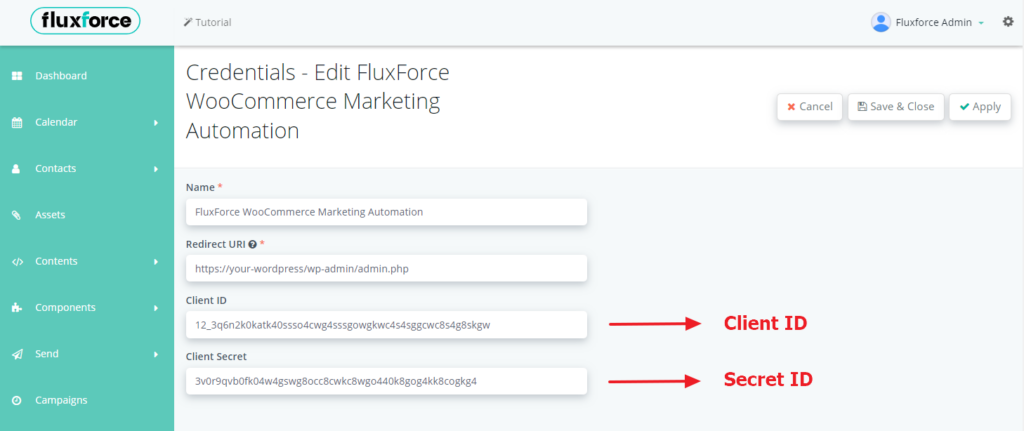
5. Save the APP and you will get the keys for connection. Use the keys as shown in image.
6. Now you have your set of API keys, you just need the FluxForce base URL for the connection. Normally your FluxForce base URL looks like: https://app.fluxforce.com/xxxxxxxxxxxxx/ and you can find it in your browser’s address bar.
Now you have all the details required for connecting your plugin to FluxForce.
7. On your website’s dashboard, go to WooCommerce -> FluxForce -> Get Started.
8. Enter your base URL, the keys you generated in step 5 and save the configuration. After that, you will be ready to authorize your FluxForce application.
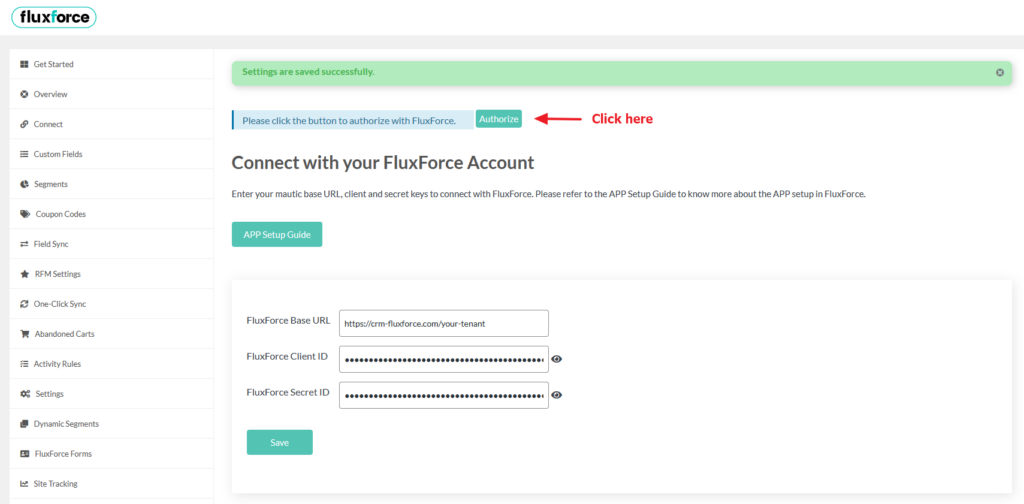
9. On clicking authorize button you will be redirected to your FluxForce account and will be asked for permission. Click on accept.

After providing the access to your application you will be redirected back to your plugin dashboard and your plugin is now successfully connected to your FluxForce account.
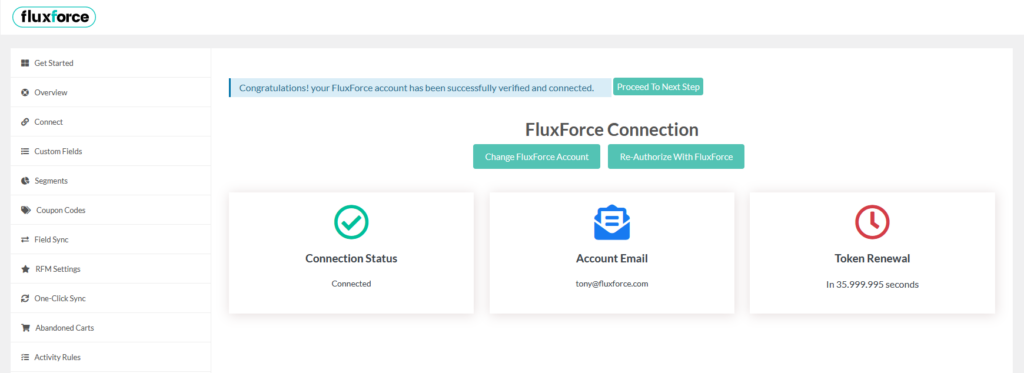
Before moving to the further steps please make sure all details (connection status, account email and token renewal) are present in the provided boxes.
To enjoy all the benefits of FluxForce, register here.